Welcome to Makeup Queens, where we cherish the art of makeup and constantly learn together. Today, we’re going to talk about one of the true classics; the winged eyeliner. A well-done winged eyeliner will instantly glam up your look, but it’s not always easy to master. In this tutorial, we'll break down the process into simple, easy-to-follow steps that will lead you towards mastering the classic look. Let's delve into the world of winged eyeliner, a signature look that never goes out of style.
Understanding the Basics
Before we dive right into creating the perfect wing, let's gather some knowledge about the fundamentals. The winged eyeliner has been a significant trend in the history of beauty. It was a standout glamorous look of the 60s, yet it still continues to be a trend to this day. The key to a perfect winged liner is practice and possessing the right tools.
To achieve the perfect winged eyeliner, you need a good eyeliner. The genre of style and endurance it has depends on your preference. Pencil eyeliners are easy to use, however, liquid and gel liners tend to have more durability and sharpness. Apart from that, it's always handy to have some cotton swabs and makeup remover within reach for any possible errors.
Knowing your eye shape is another key. Though winged eyeliner is a classic look that suits everyone, some modifications might be required for some unique eye shapes. Thus, before getting into the tutorial, take a good look at your eye shape and make some mental notes.
Step-by-Step Winged Eyeliner
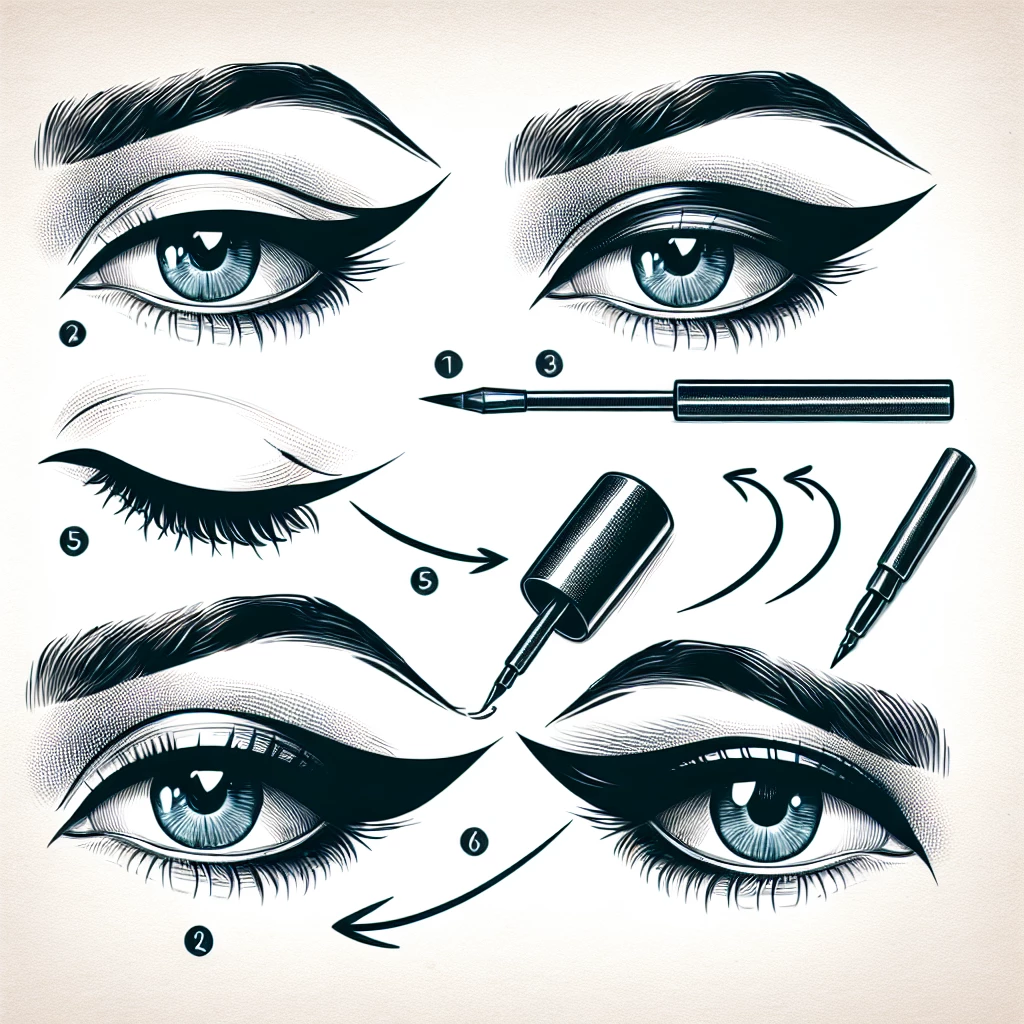
Now it's time for the actual business, let's head on to our detailed, step by step tutorial. The first task is to sanitize your hands and make sure your face is clean before launching the operation. Start with a thin line right above your lash line. The line should start at the inner corner and end where your eyelashes stop.
The next step is what actually forms the wing. Look straight into the mirror and imagine a line from the end of your eyebrow to the outer corner of your eye. This is where your wing should be pointing towards. It’s okay to mark this point with a small dot with your eyeliner. Then connect this line to your previous line. This line and the first line should meet in a sharp point.
Finally, colour in the wing with your eyeliner. Sometimes, you might desire a daring and bolder look, in which case, you just need to thicken the line. Remember to keep your hand steady and be patient through the process.
Do's and Don’ts
To improve your winged eyeliner skills, it's crucial to remember some dos and don'ts of a classic look. One general rule is that your eyeliner should either meet the end of your eyebrow or stay within those confines. You don't want to stray too far from this spot.
Another handy tip is to avoid pulling your skin too much when drawing the lines. This could lead to a wonky and uneven wing once you let go of your skin, especially with aging skin which has a little more give. In this case, it's more recommendable to tilt your head back slightly while looking straight into the mirror.
Last but not least, always have some makeup remover within reach. No one, not even the most experienced makeup artists, will get a perfect wing every single time. It's part of the process to mess up and start over.
Now, it's over to you, my beautiful queens! I hope this tutorial has provided useful insights into creating a perfect winged eyeliner – it's time to inject some sophistication and class to your everyday look. Remember, it's completely okay to make mistakes; you learn through practice. So, grab your eyeliners and get practicing. After all, makeup is all about creativity and self-expression.

Transform with Translucent Powder
Learn how to use translucent powder to set your makeup and control oil for that flawless finish.

Organic Makeup: Is It Worth It?
Discover the pros and cons of organic makeup, and decide if it’s the right choice for you.

Battle of the Brands: Makeup Comparison
In-depth comparison of popular makeup brands to help you make the best choice for your skin.

Creating a Classic Winged Eyeliner
Master the classic winged eyeliner look with our step-by-step guide.