Contouring is a makeup technique that can help you define your best features and give your face a more defined and sculptured look. It can be a game-changer, but it can also be quite challenging to master. However, with the right tools, the right makeup, and the right guidance, you can become a pro at contouring in no time. So, buckle up and get ready to dive into the intricacies of contouring because we are about to help you master the art of contouring.
Understanding the Basics of Contouring
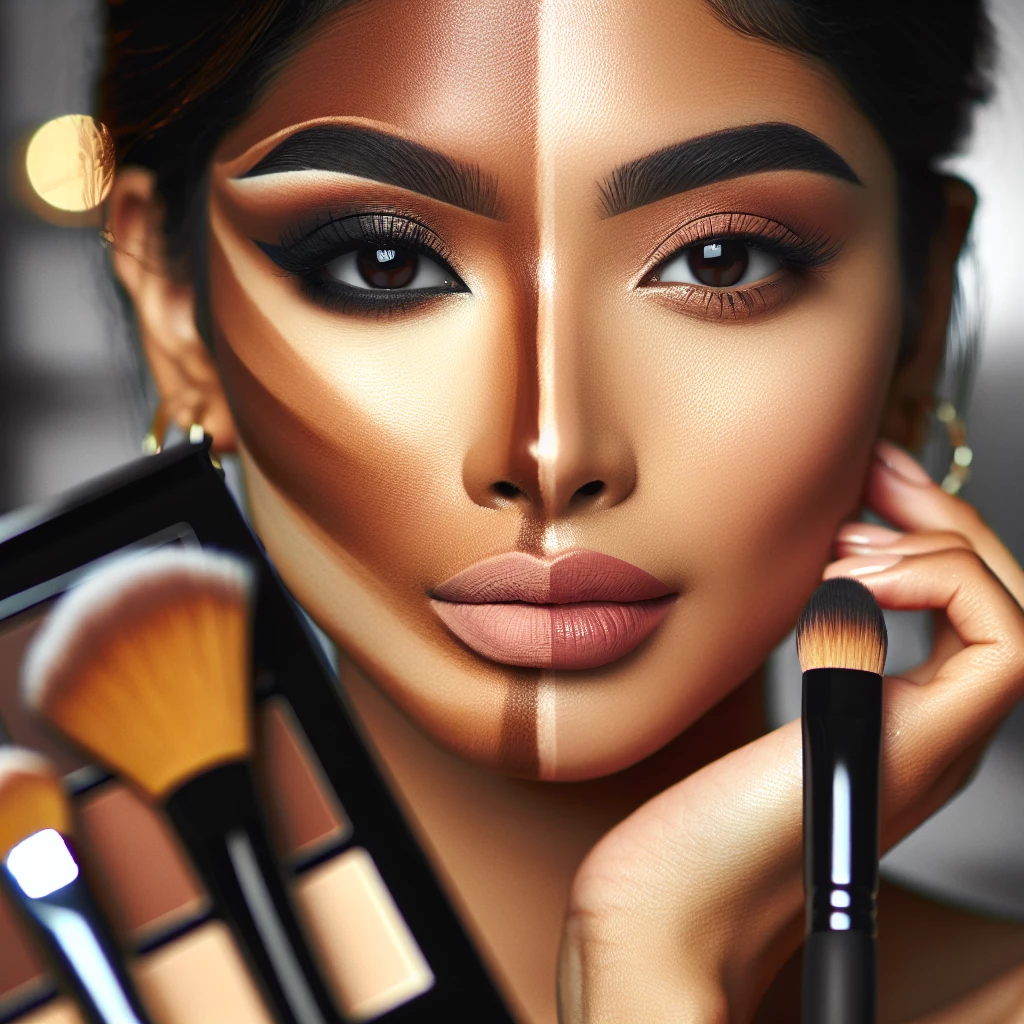
Contouring is all about playing with light and shadows to enhance or redefine the structure of your face. It can make your face look slimmer, your nose look narrower, and can even give you prominent cheekbones. To start with, you need to choose the right contouring product. It should be two shades darker than your skin tone and should ideally have a matte finish.
Then, it is about understanding the natural bone structure of your face and where to apply the contour. The general contouring points include the temples, below the cheekbones, and the sides of your nose. Remember the key is to blend, blend, and blend some more. The last thing you want is visible lines on your face.
Always start with a clean base, use a good foundation that matches your skin tone exactly. Apply the contour color in the areas you need to define and then use a smooth blending brush to blend the colors.
Choosing the Right Tools for Contouring
The right tools can make all the difference when it comes to contouring. You will need a good quality, angled contour brush for precision. A blending brush is also essential to blend out the contour and create a natural look. Some also prefer using a beauty sponge for blending.
It is also handy to have a highlighter and a bronzer in your kit. The highlighter can be used to brighten the areas of the face that naturally catch the light, while the bronzer can add a healthy, sun-kissed glow to your complexion. Make sure all brushes are clean before you start as dirty brushes can interfere with the results.
If possible, invest in a good quality contour palette. It provides a variety of shades that works for different skin tones. Most of them have a highlighting shade and a bronzing shade included, which can make things much easier for beginners.
Perfecting the Technique
As with any makeup technique, practice is key when it comes to contouring. Start by contouring the area under your cheekbones. Make a fish face to find the hollows of your cheeks and apply the contour there. Then, move on to the temples, the jawline, and the sides of the nose. Always remember to blend thoroughly to avoid harsh lines.
Once you are done contouring, it's time to use the highlighter. Apply it to the top of your cheekbones, the bridge of your nose, the center of your forehead, and your cupid's bow. This will help to lift and brighten these areas.
Take a step back, look at yourself in the mirror, and assess. If it feels too dark, use a beauty sponge to dab over the areas to soften the color. If it's not prominent enough, you can add a bit more contour.
Contouring might seem intimidating but, once you get the hang of it, it can bring about a significant change in your makeup game. It allows you to enhance your best features and give your face a balanced and sculpted finish. And remember, practice makes perfect! So, keep practicing until you master the art of contouring! Happy contouring, our lovely Makeup Queens!

Transform with Translucent Powder
Learn how to use translucent powder to set your makeup and control oil for that flawless finish.

Organic Makeup: Is It Worth It?
Discover the pros and cons of organic makeup, and decide if it’s the right choice for you.

Battle of the Brands: Makeup Comparison
In-depth comparison of popular makeup brands to help you make the best choice for your skin.

Creating a Classic Winged Eyeliner
Master the classic winged eyeliner look with our step-by-step guide.
